De-Light Film
Hardware Design
Sequential Task Analysis
I went to Harvey Milk Photo Center in San Francisco, where they have a large public darkroom, to observe and analysis what processes do film photographers do in the post process of film photography. The following charts are the documentations of 3 operations which would happen during the processes of processing films, scanning films and enlarging films in a darkroom.
Developing Film
Difficulties
Mix chemicals
Load film in the darkness
Control temperature
Focus on timing and agitation
Dry the film without water marks
......
Solutions
Automatic developing machine
Local photo labs
Online services
Scanning Film
Difficulties
Clean the scanner
Clean the film without scratching
Configure settings
Wait for scanning
Changing films in film holder
......
Solutions
Bigger scanner with better quality
Smaller scanner with portability and automatically feeding films
Enlarging in Darkroom
Difficulties
Set up a darkroom
Mix chemicals
Focus image
Test print
Dodge and burn
......
Solutions
For enlarging an image, the proper solution is to have a darkroom which requires lightproof environment, ventilation, and running water. Not a lot people would have such space and resource to build a darkroom and the methods of darkroom processes have not been changed for a long time. There used to be a product called Day-Lab. This machine can enlarge and project images from films to instant photo paper. But they discontinued the production and it is very hard to find in the market. So many film photographers end up in a tiny closet, bathroom, kitchen or a DIY portable darkroom.


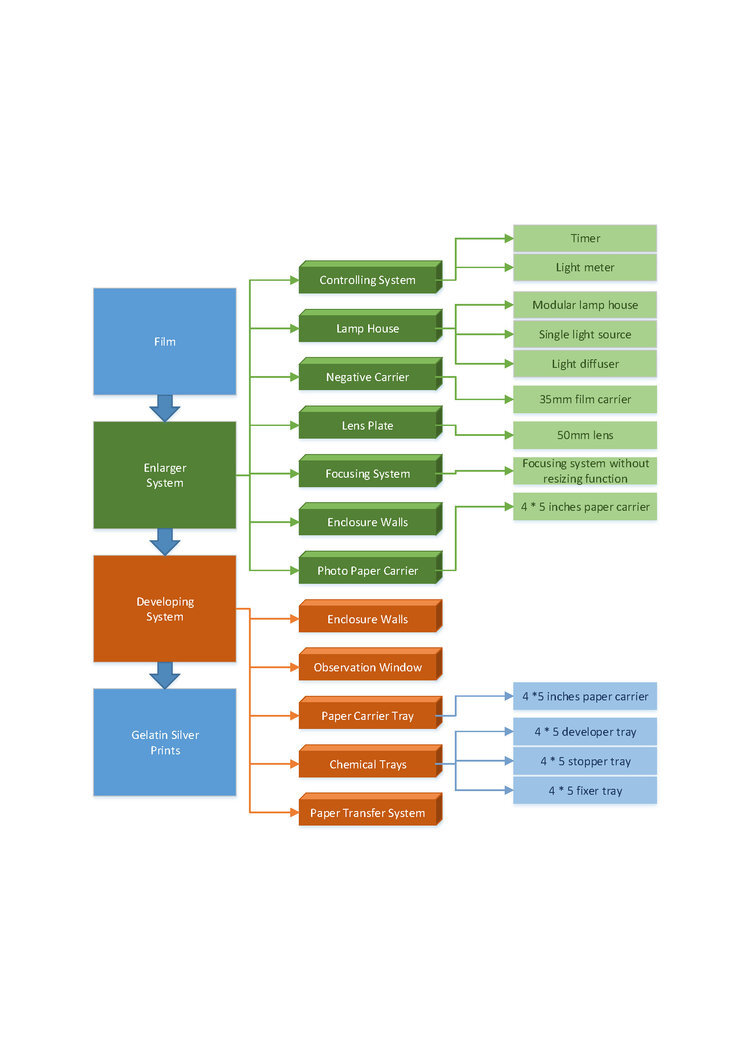
System Diagram
To achieve the same result from a traditional darkroom print using the same materials that are available to the current film photographers, the Enlarger system can utilize the main structure of an existing enlarger with additional components and modules to satisfy the requirements, which is to be operated in normal light condition.
The Developing system, on the other hand, can use the developing processes in the darkroom as a reference, but the system structure needs to be designed to accommodate the requirements.
Additionally, recognize various needs from users with different skill levels and upgradeability in the future, modular design is considered.
Novice
Amateur
Prosumer
Functional Design
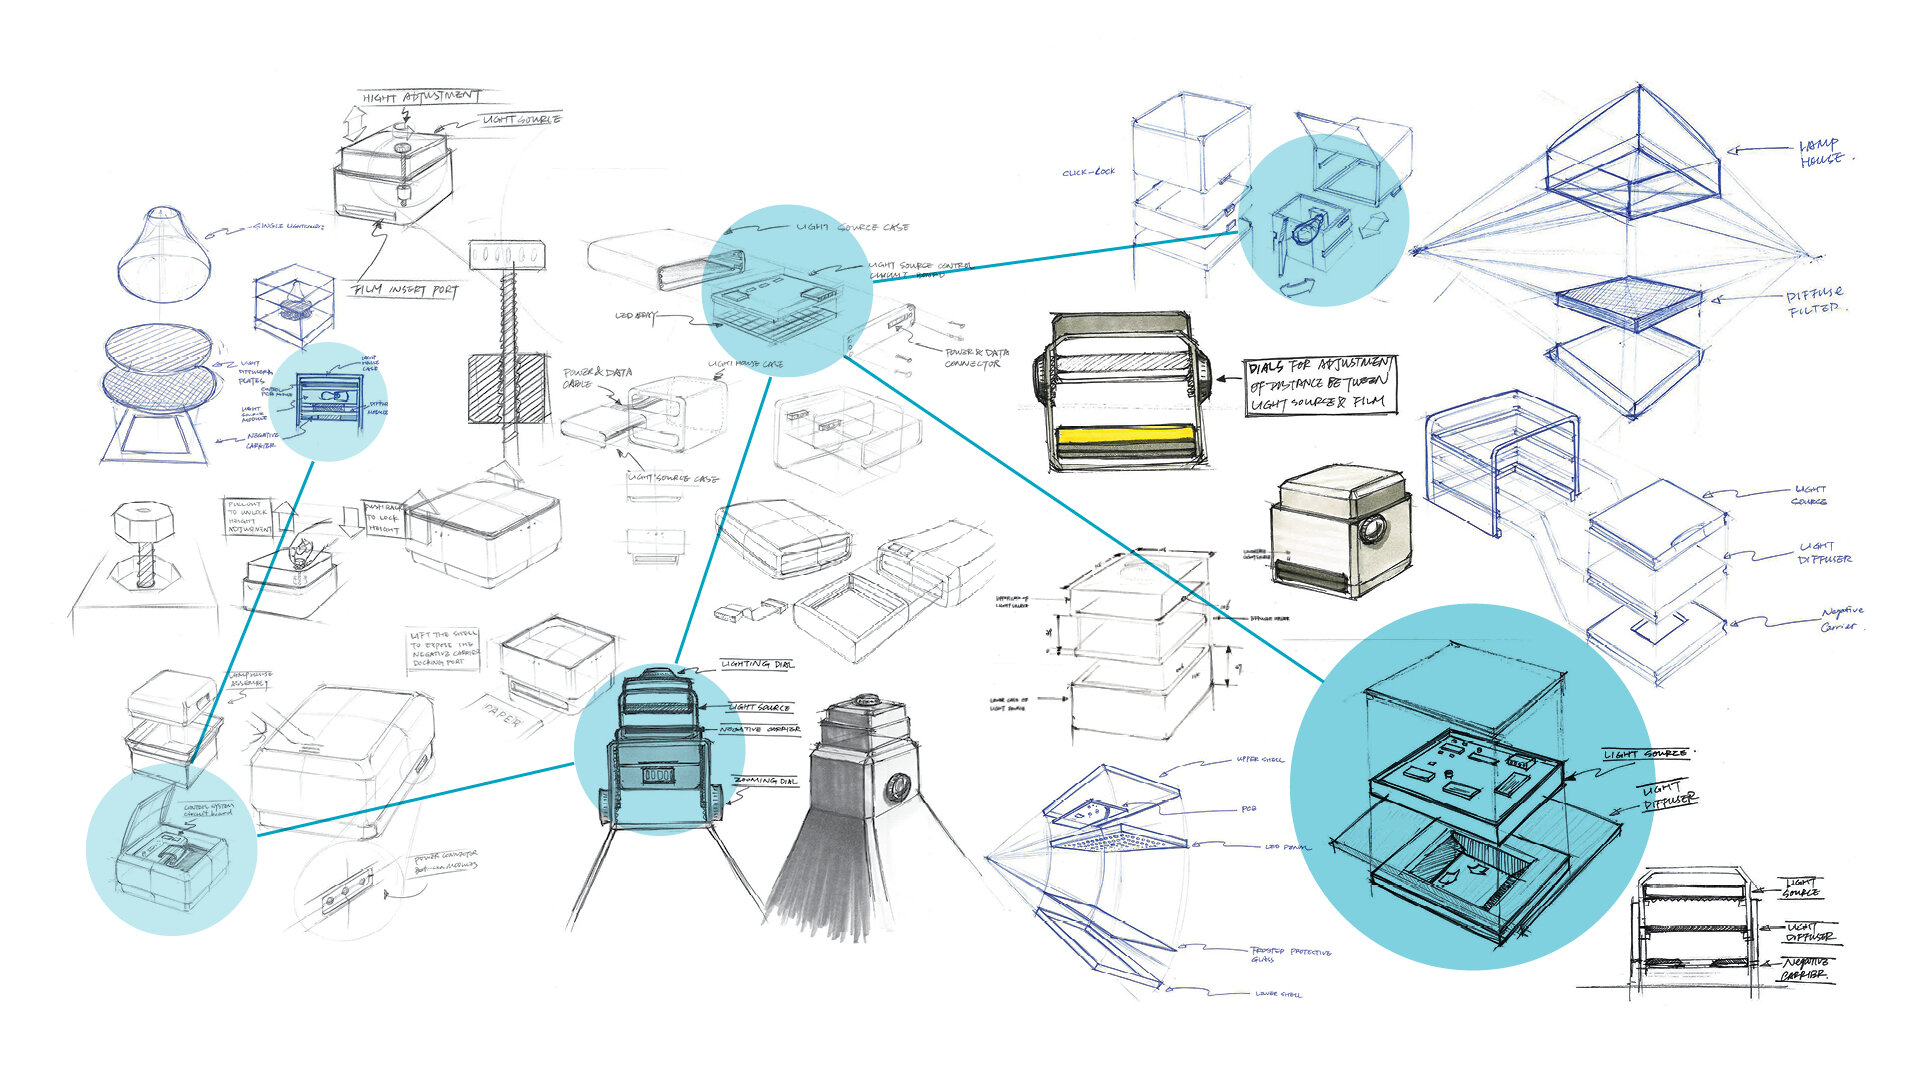
Based on the system diagram above, each functional module went through a series of design iterations to achieve functionality requirements and to make sure all of the modules are easy to repair, replace and upgrade.

Light House Module This module contains a light source and all the optical components that project an image from black and white film onto photographic paper.

Negative Carrier Negative carrier holds different formats of films in place.

Focusing Module The focusing module can be adjusted to achieve a sharp projection onto the photographic paper. It also has a digital camera to assist the focusing process and allows users to preview the image before printing.

Paper Cassette Module The paper cassette provide a light sealed environment for photographic paper before the exposure procedure. It also protect the paper in the normal lighting environment.

Developing Machine The developing machine contains 3 to 4 different chemical liquid (depends on the type of the photographic paper) to develop exposed photographic paper into a real photo.
Mood Board
Form Exploration
Color Study
Mockups

Enlarger & Developer

Modular Design

Enlarger Body and Paper Cassette

Light House

Developer

Chemical Boxes & Developing Tray

Chemical Resistant Pump

Developing Tray Dock
Usability Test & Refinement
Prototype
For prototype I combined with 3D printing and acrylic sheet together. I 3D printed internal components and radius corner of the enclosure. I laser cut out the flat surface and then glue them together. The top part of the enlarger and developer is too big and complicated for FDM 3D printer. I send it to a 3D printing company to print with resin.


